
Servo motors let your Arduino move things to an exact angle — perfect for robot arms, steering, camera mounts and animatronics. In this guide you’ll control an SG90 or MG996R servo and make it sweep back and forth.
What you’ll need
- Arduino Uno R3 — controls the servo
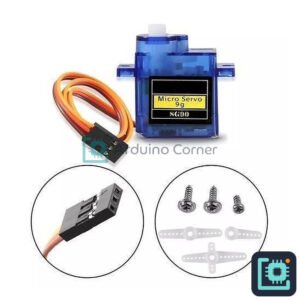
- SG90 9g Micro Servo — light, cheap, great for learning
- MG996R High-Torque Servo — for heavier loads (needs external power)
- Jumper Wires — to connect the servo
How a servo works
A hobby servo has three wires: brown/black = GND, red = 5V, and orange/yellow = signal. The Arduino sends a PWM pulse on the signal wire and the servo moves to a matching angle between 0° and 180°. The Servo library handles the timing for you.
Wiring
- Signal (orange) → Arduino D9
- VCC (red) → Arduino 5V (small SG90 only)
- GND (brown) → Arduino GND
Important: a powerful MG996R can draw more current than the Arduino’s 5V pin can supply. Power it from a separate 5–6V supply and connect the grounds together, or the Arduino may reset.
The Arduino code
#include <Servo.h>
Servo myServo;

void setup() {
  myServo.attach(9);   // signal wire on D9
}

void loop() {
  for (int angle = 0; angle <= 180; angle++) {  // sweep up
    myServo.write(angle);
    delay(15);
  }
  for (int angle = 180; angle >= 0; angle--) {  // sweep back
    myServo.write(angle);
    delay(15);
  }
}
To move to a fixed position instead of sweeping, just call myServo.write(90); for the mid-point.
Project ideas
- A robot arm or gripper.
- A pan/tilt camera or radar mount.
- An automatic pet feeder or door lock.
Get the parts
Everything for this project is in stock at Smart Home | Arduino Corner — Shaheen Market, DAV College Road, Rawalpindi — with fast, cash-on-delivery shipping across Pakistan. Pick up an SG90 to start, or an MG996R for stronger builds. Browse the full store →