
Both of these do the same job — switch a light on when someone is in the room — but they suit completely different situations, and buying the wrong one usually means chopping a hole in a ceiling you did not need to touch. Here is how to choose in about thirty seconds.
Side by side
| Recessed ceiling sensor | Type-86 wall panel | |
|---|---|---|
| Where it mounts | Cut-out in the ceiling, spring clips hold it | Existing 86×86mm switch box |
| Coverage | 360°, looks down over the whole room | Roughly 110–140° forward cone |
| Installation work | Needs a hole and a cable run | Swap for the old switch, usually no new holes |
| How visible it is | Looks like a small downlight | Looks like a normal wall plate |
| Blind spots | Almost none within the room | Behind and beside the panel |
| Best rooms | Corridors, bathrooms, offices, landings | Bedrooms, stairs, entrances, shop aisles |
How each one wires in
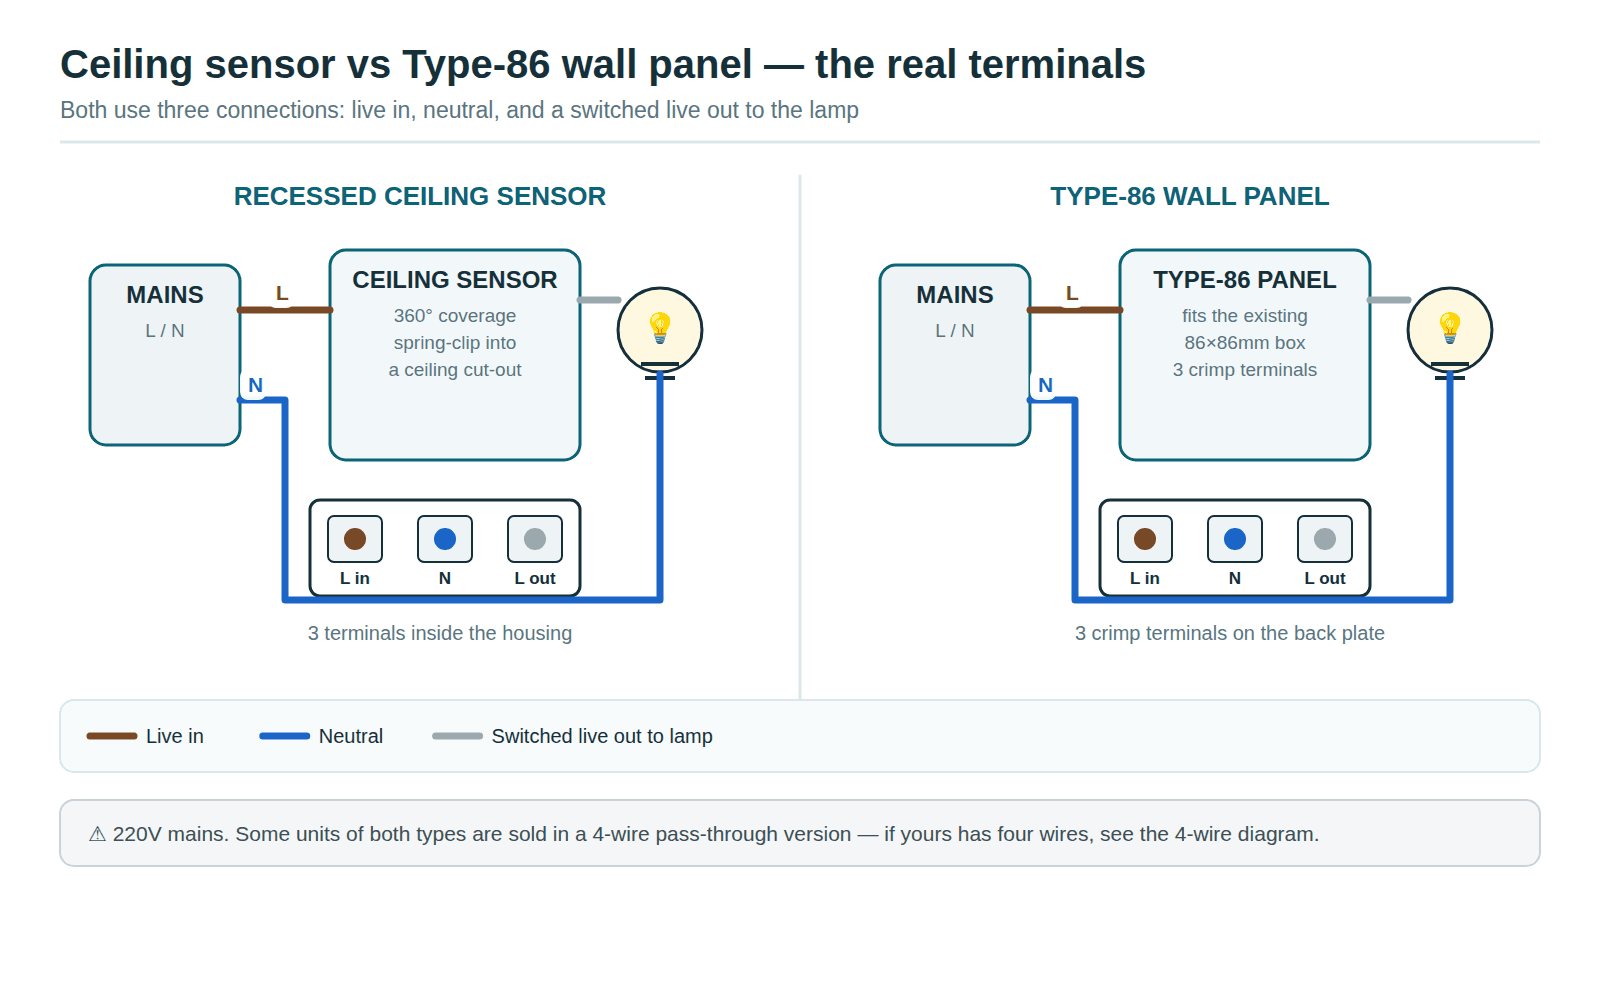
Electrically they are close to identical: live and neutral in, one switched live out to the lamp. The difference is entirely mechanical — where the body sits and which way the lens looks.
When the ceiling sensor is clearly right
Pick the recessed ceiling sensor when the space is wider than it is deep, or when people enter it from more than one direction. A corridor with doors on both sides is the classic case — a wall panel facing one way will keep missing people who come from the other. Bathrooms are the second classic case, because you want the light to hold while someone is at the basin, out of a wall sensor’s cone.
It also wins on looks. Once it is in, it reads as a small downlight, which is why offices and newer houses use them almost exclusively.
The cost is installation: you need a hole in the ceiling and a cable to it. If the ceiling is already open, or a light point is already up there, that cost is close to zero. If it is a finished concrete ceiling, it is real work.
When the wall panel is clearly right
Pick the Type-86 IR motion sensor wall switch when there is already a switch on the wall. That is the whole argument — the box, the cable and the hole all exist. You are swapping a mechanical switch for one that thinks. In an existing house this turns a two-hour job into a ten-minute one.
It suits entrances and stairs particularly well, because people arrive from a predictable direction and walk straight into the sensor’s cone. In a shop it works nicely at the end of an aisle.
The limitation is that forward cone. Anything beside or behind the plate is invisible to it, so a wall panel in the middle of a large room will disappoint you.
The four-wire version — count your wires first
Not every sensor of this shape is a three-wire unit. The compact recessed sensors that arrive on a small four-pin connector are a pass-through design: the mains pair goes in on one side, and the lamp gets its own dedicated pair out the other. If you wire one of these expecting three wires, you will be left holding a wire with nowhere to go.
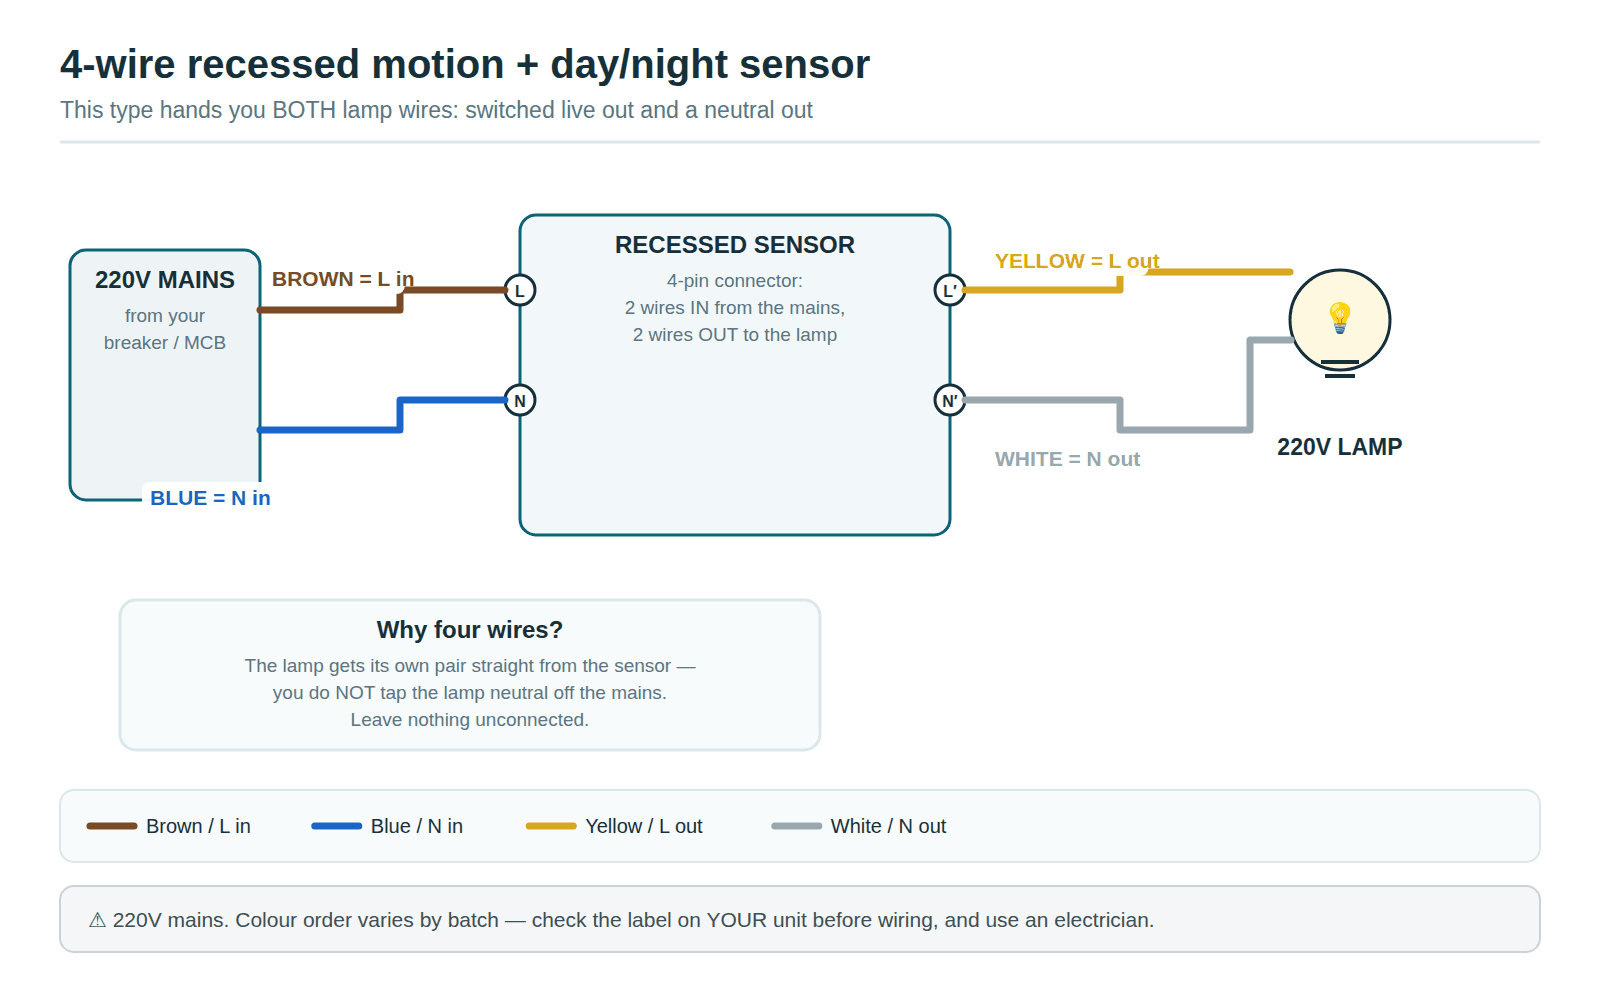
So before anything else, count the wires coming out of your unit. Three means live in, neutral, switched live out. Four means a mains pair in and a lamp pair out. Our 220V motion and day/night sensor is the four-wire type.
A rule of thumb that works
- Does the room already have a wall switch you are happy to lose? → Type-86 panel.
- Do people enter from more than one direction? → Ceiling sensor.
- Is the ceiling already open, or is there a light point up there? → Ceiling sensor.
- Do you want zero visible change to the room? → Ceiling sensor.
- Do you want zero drilling? → Type-86 panel.
What about the other options?
If neither fits, there are two more shapes worth knowing. An E27 sensor bulb holder needs no switch and no ceiling work at all — ideal for store rooms and rented places. An adjustable PIR wall sensor mounts on the surface with a swivel head, which is what you want outdoors or down a driveway where aim matters more than looks.
Frequently asked questions
Can I fit a ceiling sensor into a concrete ceiling?
Only where a cut-out already exists or can be made — typically in a false ceiling or a gypsum board. In solid concrete, use a surface-mount sensor instead.
Will the wall panel fit my existing switch box?
If it is the standard 86×86mm box used across Pakistan, yes. Measure the plate before ordering if you are unsure.
Do both have day/night control?
Yes, both keep the lamp off while there is enough daylight, which is where most of the electricity saving actually comes from.
Can I use one sensor for several lights?
Yes, up to the sensor’s rated load. Join the lamps’ live terminals to the same switched output.
Related guides
- How to wire a 220V PIR motion sensor light switch
- E27 motion sensor bulb holder guide
- Smart home upgrades that need no Wi-Fi
Get the parts
Both sensors are in stock at Smart Home | Arduino Corner — Shaheen Market, DAV College Road, Rawalpindi. Bring a photo of the room or the switch box and we will tell you which one fits. Same-day delivery in the twin cities, cash on delivery nationwide.