
Clap your hands and the light comes on. Clap again and it goes off. This version does it properly: a microphone sound sensor feeds a real microcontroller, and a relay module does the switching — so it drives an actual lamp, not just a little indicator LED.
Below: the wiring diagram, the Arduino code, and the safety rules you must follow if you switch mains.
What you’ll need
- Arduino Uno R3 (with USB cable) — runs the code
- LM393 Sound Sensor Module — hears the clap
- 1-Channel 5V Relay Module — switches the lamp
- Jumper Wires (M-F) — six connections in total
New to Arduino? Start with the Arduino Uno Starter Kit.
Wiring diagram
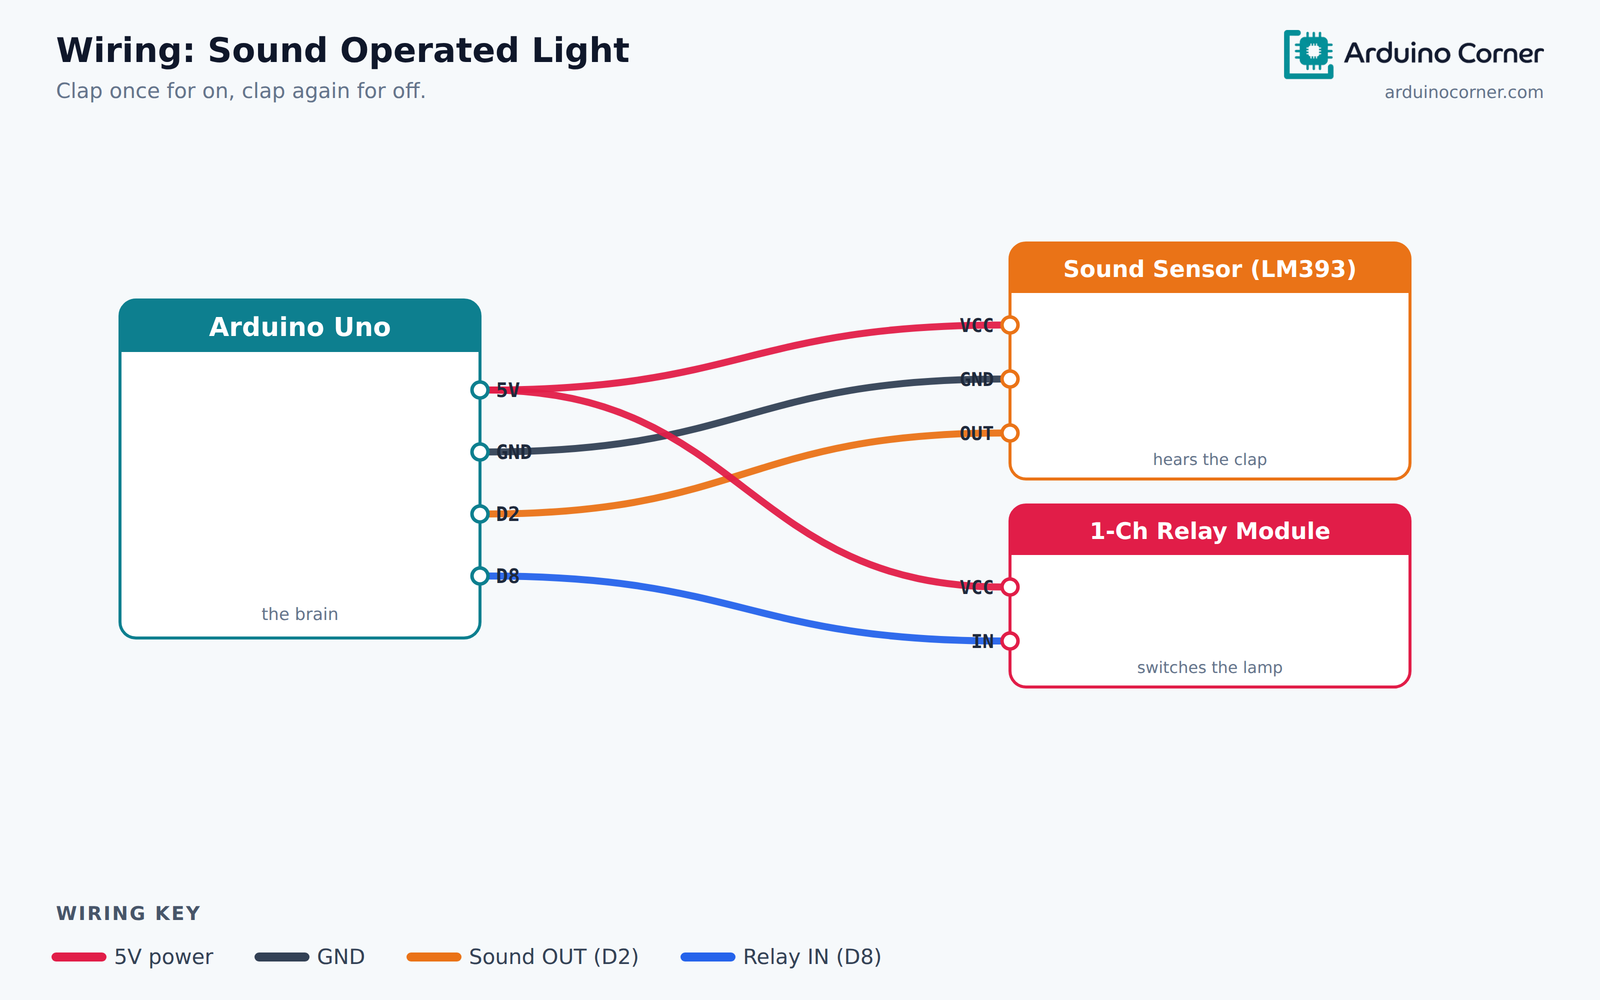
The same connections as a quick reference table:
| From (module) | To (Arduino Uno) |
|---|---|
| Sound sensor — VCC | 5V |
| Sound sensor — GND | GND |
| Sound sensor — OUT | D2 |
| Relay module — VCC | 5V |
| Relay module — GND | GND |
| Relay module — IN | D8 |
⚠️ If you switch a mains lamp, read this first
The relay’s low-voltage side is safe. The output side is not. If you are switching a 220V bulb, the relay’s screw terminals carry mains voltage and can kill you. Never work on the circuit while it is plugged in, keep the mains wiring inside an enclosure, and if you are a student building this for a project, ask someone experienced to check it before powering up. A low-voltage LED bulb is a perfectly good demonstration and carries none of this risk.
How it works
The sound sensor is not a microphone the Arduino “listens” to. It has an LM393 comparator on board: when the sound level crosses a threshold set by the little blue potentiometer, its OUT pin snaps HIGH for a few milliseconds. The Arduino just watches for that pulse.
Each accepted pulse flips a stored lightOn variable, and the relay follows it. That stored state is what makes it a switch rather than a light that is only on while you are clapping.
The Arduino code
const int soundPin = 2;   // sound sensor digital output
const int relayPin = 8;   // relay module IN

bool lightOn = false;
unsigned long lastClap = 0;
const unsigned long debounce = 300;   // ignore echoes for 300 ms

void setup() {
  pinMode(soundPin, INPUT);
  pinMode(relayPin, OUTPUT);
  digitalWrite(relayPin, HIGH);       // most relay boards are active LOW
}

void loop() {
  if (digitalRead(soundPin) == HIGH && millis() - lastClap > debounce) {
    lastClap = millis();
    lightOn = !lightOn;                       // flip the state
    digitalWrite(relayPin, lightOn ? LOW : HIGH);
  }
}
Understanding the code
The debounce window is what makes this usable. A single clap is not one clean pulse — it echoes off walls and can trigger the sensor three or four times in quick succession, which would flip the light on and straight back off. Ignoring anything within 300ms of the last accepted clap fixes it.
Note digitalWrite(relayPin, HIGH) in setup(). Most cheap relay boards are active LOW: HIGH means off. Getting this backwards is why people find their lamp switches on the instant they power up.
Troubleshooting
- Triggers constantly: the sensitivity pot is too high. Turn it down until the module’s LED stops flickering at room noise.
- Never triggers: too low — turn it up, and clap closer to the mic.
- Light flickers on one clap: increase
debounceto 400 or 500. - Relay clicks but the lamp stays off: check which relay terminals you used. Most boards give you both normally-open and normally-closed contacts.
- Lamp is on at startup: your relay is active HIGH — swap the HIGH and LOW values.
Take it further
- Require two claps to toggle, so ordinary noise cannot switch the light.
- Add an automatic switch-off after a set time.
- Combine it with an LDR so claps only work after dark.
- Swap the single relay for a 4-channel relay and clap-control several appliances.
Prefer it ready-made?
Tuning the sensitivity and getting the relay logic the right way round is where most builds stall. If you would rather skip the wiring, we sell this exact project fully assembled and mounted on a presentation board — see the Arduino Sound Operated Light Project. It is the same circuit described above, built and ready to demonstrate, which is what most students submitting a project actually need.
Frequently asked questions
Why does my light sometimes toggle twice?
Claps echo. Increase the debounce value until a single clap gives a single, reliable toggle.
Can it respond to my voice instead?
It responds to any sharp sound above the threshold, so a shout works. It cannot recognise words — that needs a voice-recognition module.
Can I use it without an Arduino?
Yes — a dedicated sound-control switch module does this in hardware, with no code. It is simpler, but you lose the ability to change the behaviour.
Will it work in a noisy classroom?
Turn the sensitivity down so only a close, sharp clap crosses the threshold. That is exactly what the potentiometer is for.
Related project guides
Get the parts
Everything for this build is in stock at Smart Home | Arduino Corner — Shaheen Market, DAV College Road, Rawalpindi — and ships across Pakistan with cash on delivery. Grab the LM393 Sound Sensor Module and a 1-Channel 5V Relay Module. Message us on WhatsApp and we will put the whole kit together for you.